Showing posts with label Flash Photography. Show all posts

Tuesday, December 23, 2014

NASTY CLAMPS

Lil' Bit Nasty Clamp

A while ago, I got my hands on couple of Nasty Clamps for review, and I have not been able to put them down since. The Nasty Clamps are a very simple idea that is extremely well executed and also made right here in Oregon.

IMG_20130314_182913

What they are is a very strong spring clamp mounted on the end of an articulation arm made up of medium sized segments. At the end of the assembly there is a standard ¼ 20 male mounting thread and locking ring to keep whatever you mount on it tight and stable.

I took the Clamps out for a spin with me on a location shoot at a local radio station where I was meeting my client to take some head shots. We set up in the conference room with a standard portable backdrop and started taking some shots. After getting the traditional staple shots we moved around the room working on some environmental portraits. I wanted to work with the large table in the center of the room but setting up my flashes on it with stands either brought the light way too high or without the stands way too low. That is when I busted out the Nasty Clamps to see what I could do with them in this situation.

I mounted one of my flashes on the ¼ 20 thread and then clamped it to the back of one of the rolling office chairs next to my subject. Then I placed a Rogue XL Pro Lighting Kit to the mounted flash. I have to admit that I did not think that the Clamp would hold the weight of the flash and the modifier, but it did and was rock solid through all of my position adjustments. Once I began shooting it was very easy to make adjustments to the Nasty Clamp and its’ long multi segmented arm gave me a fantastic range of movement to get my light in just the spot I wanted it to be in, and better yet, it kept it there!

The Nasty Clamp itself is made out of high quality metal with a black coating over it and the tips are coated in a thick rubber like material that gives it exceptional gripping power. The arm assembly is made up of numerous segmented joints that have a ball and socket like interface that has just the right amount of resistance to keep the arm from slipping when objects are mounted to it.

The more I take the Nasty Clamps out with me the more I find uses for them. They come in very handy for holding accent flashes that are tucked away in awkward places. They have totally earned a permanent spot in my bag every time I go out to shoot.  I cannot recommend the Nasty Clamp enough for an everyday item in your bag especially if you are a location shooter.

For more information on the Nasty Clamps and their other products check out their site at www.nastyclamps.com.

Sunday, December 21, 2014

Setting Up the Shot - Red Sierra 2

sierra red 2

Camera - Nikon D2X
Lens - Nikon 50mm f/1.8G AF-S
Exposure - 1/250 @ f/7.1
Focal Length - 50mm
Lighting - LumoPro LP180, and LP160
Light Modifier(s) - Rogue XL Pro Strip Box
Trigger - Pixel Opas

Two light set up. The key light is a LP180 with a Rogue XL Pro Strip Box as the modifier to camera right. I feather the edge of the light to create a deep shadow on the opposite side o he subjects face.

The second light was a LP160 and was set up off to camera left with the flash head zoomed to about 105mm to create a controlled and slightly vignetted spot on the background directly behind the subjects head and shoulders.This second light was needed in order to create some separation between the subject and the background and to provide some depth to the picture.

Friday, December 19, 2014

Flash Facts – Bounce Flash


One flash rule to remember is that the larger the light source, the softer the light. The smaller the light source, the harder the light. This means that the larger soft light will have softer edges in the shadows and the smaller hard light will have a more defined edge at the shadows. This technique also works very well with ceilings.


One very easy way to turn the small light from your shoe mounted flash into a large soft light source is to bounce your flash light off of a nearby wall. You do this by having the person you are photographing move near a wall or large solid surface, then you rotate your shoe mounted flash so that it is facing the opposite wall and not directly at your subject.


When you fire the flash it is going to bounce off of the wall that it is aimed at and turn into a much larger light source, thus creating a softer edge for your shadows.

One thing to keep in mind when using this technique is the color of the wall. The color of the wall is going to influence the color of the light hitting the subject. By this I mean that if you have a white wall to bounce your flash off of it is not going to be that big of a deal, but if the wall is, let's say red, then that will tint your light with red.


There are a few different way to counteract this light tinting problem. The two easiest way is by either changing the white balance of the flash, or by changing the light from the flash with a colored gel. The exact color and white balance combinations will depend on the color of the area, the wall, and also by what color you want the light to be.

Depending of the color of the surface I will usually start with the white balance for color correction. When it is warm or cool colors changing the white balance is the easiest. I suggest you correct the white balance in camera during the shoot, but you can change it in post as well.

Wednesday, December 17, 2014

CHRISTMAS DISCOUNTS IN NEW PHOTTIX ONLINE STORE

What’s New?  Phottix Mitros and Mitros+ Flashes for Sony (ISO Shoe)


After considerable development and testing Phottix is happy to announce the newest addition to the Phottix Mitros+ family: The Phottix Mitros TTL Flash for Sony (ISO Hot Shoe) and thePhottix Mitros+ TTL Transceiver Flash for Sony (ISO Hot Shoe).


Use the Mitros+ on-camera as a key or fill light, as well as control and trigger other Mitros+ flashes or compatible flashes using Phottix Odin Receivers. The Mitros+ also offers a built-in Phottix Odin Receiver and Strato II Receiver.

Features

  • GN: 58 Sony-Compatible TTL Flash
  • Built-in: Phottix Odin Transmitter and Receiver, and Strato II Receiver
  • Sony-compatible Master/Slave IR Triggering Modes
  • High Speed Sync
  • AF Assist Light
  • External Battery Port, 3.5mm Sync Port
  • Quick Flash Mode
Jump over to the Phottix Online Store for more details. Use code XMAS2014 at checkout to save 10% on your holiday orders.

Screen Shot 2014-12-09 at 11.59.46 AM

Speaking of the Photix Mitros and Phottix Odin – I spy my little eye celebrity photographerMatthew Jordan Smith shooting with both Phottix products in a video recently released by Gary Fong.


Now in Silver – A New Phottix Luna Beauty Dish


The Phottix series of Luna Beauty Dishes and Softboxes have been very popular. We’re adding a new silver interior 85cm Phottix Luna Beauty Dish to the line-up. Silver beauty dishes add more contrast and “pop” to an image and are great for fashion photography.

With Luna interchangeable speed rings (Bowens mount included), the Luna series modifiers can be used on many different studio lights, or with the Phottix Mitros series flashes when combined with the Phottix HS Speed Mount II.

Jump over to the Phottix Online Store for more details. Use codeXMAS2014 at checkout to save 10% on your holiday orders.


Phottix VLED Video Lights Available


The Phottix VLED Video Light are available in three sizes, with 168, 198 or 260 LEDs these are the perfect continuous lighting solution for video cameras or DSLRs. With the included battery adapters, popular camera batteries from Canon, Nikon, Panasonic and Sony can be used to power the VLED. The VLEDs can be combined vertically or horizontally to create larger banks of light.

Output Specs
VLED 168, Output: 1050 Lumens
VLED 198, Output: 1250 Lumens
VLED 260, Output: 1600 Lumens

Jump over to the Phottix Online Store for more details. Use code XMAS2014 at checkout to save 10% on your holiday orders.


Phottix Varos H-Mount Plate and Strap


Mounting flashes by the hot shoe can cause some issues. When using umbrellas the light from a vertical flash does not hit the center of the umbrella as it is much taller. This cuts down on the effectiveness of the umbrellas as a lighting modifier.

Phottix comes to the rescue with the new Phottix Varos H-Mount Plate and Strap. Using this kit with a Phottix Varos Umbrella Adapter allows flashes to be mounted horizontally, more in line with the center of a reflective or shoot through umbrella. Included are the H-Mount Plate and Velcro Strap, a 3/4″ lug threaded in 1/4×20 and 3/8″ and a locking ring.

Jump over to the Phottix Online Store for more details. Use codeXMAS2014 at checkout to save 10% on your holiday orders.


Phottix Hot Shoe Gel Set


Using gels with hot shoe flashes can be challenging. How can you attach them? With Velcro tabs or gaffer tape or some other inelegant contraption.

Enter the Phottix Hot Shoe Gel Set. This set includes a plastic gel mounting bracket that easily attached to most hot shoe flash heads using a Velcro strip. Easy use any of the 30 included gels with hot shoe flashes. The black/silver attachment can be used a barndoor/flag or a bounce card.

Jump over to the Phottix Online Store for more details. Use code XMAS2014 at checkout to save 10% on your holiday orders.

Tuesday, December 16, 2014

PROFOTO HSS IS HERE.

Profoto-HSS

Up until now, HSS solutions have been either consistent but lacking in speed and power, or fast and powerful but inconsistent. Today, we release Profoto HSS – a new solution that has all of the benefits and none of the limitations.


ProfotoHSS_collage_

High-Speed Sync (HSS) is the technical term for syncing flash with shutter speeds shorter than the so-called x-sync, typically 1/250 of a second. It is a useful tool for controlling ambient light and for freezing action. But there used to be limitations.

Current solutions for speedlights give you a fairly even exposure. But it does so at the expense of speed and power. Previous solutions for larger flashes were faster and more powerful. But the exposure could differ as much as 2 f-stops in a single shot.

Profoto’s new solution for the B1 Off-Camera Flash has all of the benefits and none of the limitations. The B1 itself is about ten times as powerful as the average speedlight and fast enough to keep up with your camera. With the new Profoto HSS upgrade installed, you switch to HSS Mode with a simple button-press. You will then be able to shoot at shutter as fast as 1/8000 of a second.

But it does not stop there. Profoto HSS is a unique, patent-pending technology, providing an extremely fast series of flash pulses. What this means in practice is that you get an extremely consistent exposure with no measurable variation over the image.

In other words, Profoto HSS is fast, powerful and consistent. This will open up a whole new world of light shaping possibilities for you. For instance, you can now shoot with a large aperture in bright conditions to get a shallow depth of field and get that perfect deep blue sky. Or capture super crisp action in mixed light conditions without getting motion blur from ambient light. Etcetera, etcetera.

Needless to say, Profoto HSS works for both Canon and Nikon and has been tested for all common camera models.

Also note that you can use Profoto HSS both with and without TTL. Or do both! Shoot with TTL first to get a technically perfect exposure, and then switch to Manual Mode with the same readings and settings and do whatever creative adjustments you feel like doing. It is a huge time saver. Plus you can leave that light meter at home!

Profoto HSS is available through a simple firmware upgrade.

Click here and download it for free.

Note that you will need to do download separate upgrades for the B1 Off-Camera Flash and the Air Remote TTL-C and Air Remote TTL-N, and then upgrade both flash and remote.

Once installed, HSS Mode is activated with a simple button-press. There is no need to change the flash bulb or messy stuff like that.

Monday, December 15, 2014

Setting Up The Shot - Miranda Off the Shoulder

i-JsfMdgm-XL
Camera - Nikon D300
Lens - Nikon 50mm f/1.8G AF-S
Exposure - 1/250 @ f/9
Focal Length - 50mm

Lighting - Nikon SB-700
Light Modifier(s) - 43" Optical White Satin with Removable Cover Collapsible Umbrella
Trigger - Nikon SU-800

This is one of my typical one light set ups. I used a 43" Optical White Satin with Removable Cover Collapsible Umbrella high to camera left to let the light fall off on the opposite side of her face. To help with some separation from the background I feathered the light to give just a hint of light to the background to give it a slightly different tone. I had the subject move away from the wall in order to get just the right amount of light on the back ground.

Thursday, December 11, 2014

Phottix Updates

Phottix-Logo

Hello Phottix Friends

The end of the year is drawing near and Phottix has some hot deals in the newly revamped Phottixstore.com. From now until December 31, 2014, receive 10% off everything atPhottixstore.com by using the code XMAS2014 at checkout.


What New?  Phottix Mitros and Mitros+ Flashes for Sony (ISO Shoe)

After considerable development and testing Phottix is happy to announce the newest addition to the Phottix Mitros+ family: The Phottix Mitros TTL Flash for Sony (ISO Hot Shoe) and thePhottix Mitros+ TTL Transceiver Flash for Sony (ISO Hot Shoe).Use the Mitros+ on-camera as a key or fill light, as well as control and trigger other Mitros+ flashes or compatible flashes using Phottix Odin Receivers. The Mitros+ also offers a built-in Phottix Odin Receiver and Strato II Receiver.

Features
  • GN: 58 Sony-Compatible TTL Flash
  • Built-in: Phottix Odin Transmitter and Receiver, and Strato II Receiver
  • Sony-compatible Master/Slave IR Triggering Modes
  • High Speed Sync
  • AF Assist Light
  • External Battery Port, 3.5mm Sync Port
  • Quick Flash Mode
Jump over to the Phottix Online Store for more details. Use codeXMAS2014 at checkout to save 10% on your holiday orders.


Speaking of the Photix Mitros and Phottix Odin - I spy my little eye celebrity photographer Matthew Jordan Smith shooting with both Phottix products in a video recently released by Gary Fong.


Now in Silver - A New Phottix Luna Beauty Dish

The Phottix series of Luna Beauty Dishes and Softboxes have been very popular. We're adding a newsilver interior 85cm Phottix Luna Beauty Dish to the line-up. Silver beauty dishes add more contrast and "pop" to an image and are great for fashion photography.

With Luna interchangeable speed rings (Bowens mount included), the Luna series modifiers can be used on many different studio lights, or with the Phottix Mitros series flashes when combined with the Phottix HS Speed Mount II.

Jump over to the Phottix Online Store for more details. Use codeXMAS2014 at checkout to save 10% on your holiday orders.


Phottix VLED Video Lights AvailableThe Phottix VLED Video Lightare available in three sizes, with 168, 198 or 260 LEDs these are the perfect continuous lighting solution for video cameras or DSLRs. With the included battery adapters, popular camera batteries from Canon, Nikon, Panasonic and Sony can be used to power the VLED. The VLEDs can be combined vertically or horizontally to create larger banks of light.

Output Specs
VLED 168, Output: 1050 Lumens
VLED 198, Output: 1250 Lumens
VLED 260, Output: 1600 Lumens

Jump over to the Phottix Online Store for more details. Use codeXMAS2014 at checkout to save 10% on your holiday orders.


Phottix Varos H-Mount Plate and Strap

Mounting flashes by the hot shoe can cause some issues. When using umbrellas the light from a vertical flash does not hit the center of the umbrella as it is much taller. This cuts down on the effectiveness of the umbrellas as a lighting modifier.

Phottix comes to the rescue with the new Phottix Varos H-Mount Plate and Strap. Using this kit with a Phottix Varos Umbrella Adapter allows flashes to be mounted horizontally, more in line with the center of a reflective or shoot through umbrella. Included are the H-Mount Plate and Velcro Strap, a 3/4" lug threaded in 1/4x20 and 3/8" and a locking ring.

Jump over to the Phottix Online Store for more details. Use codeXMAS2014 at checkout to save 10% on your holiday orders.


Phottix Hot Shoe Gel Set

Using gels with hot shoe flashes can be challenging. How can you attach them? With Velcro tabs or gaffer tape or some other inelegant contraption.

Enter the Phottix Hot Shoe Gel Set. This set includes a plastic gel mounting bracket that easily attached to most hot shoe flash heads using a Velcro strip. Easy use any of the 30 included gels with hot shoe flashes. The black/silver attachment can be used a barndoor/flag or a bounce card.

Jump over to the Phottix Online Store for more details. Use codeXMAS2014 at checkout to save 10% on your holiday orders.


Connect with Phottix

Keep up with all the latest news from Phottix. Join our social networks and get the newest info as well as see the great work done with Phottix products.
- Subscribe to the Phottix Journal Blog by RSS
or Email
- Join the Phottix Facebook Fan Page
- Follow us on Twitter
- Connect with us on flickr and join the Phottix Photos Group

Tuesday, December 9, 2014

Flash Facts – Controlling Flash Exposure.


When using flash your aperture is going to control how much light from the flash enters the camera. The shutter speed is going to control how much ambient light enters the camera.

Once you have a feel for how these two variables are going to affect your shot you will then be able to make adjustments from the camera to control your flash and ambient light exposure.

Making adjustments to the aperture to control how much of the flash light enters the camera is also going to affect your depth of field. If you are not too concerned with your depth of filed then you can make adjustments solely for your flash. However if you do care about your depth of field, as you really should, making adjustments via the aperture is not gong to be the best option for you.

When you have to keep a specific depth of field for your shot you will need to work more with the power level of the flash or the distance of flash to subject. Using these variables for adjustment will keep your depth of field wherever you had it set.

Try setting up a static shot of just about anything around the house and throw a flash on it. Walk your aperture up and down and see how you can control both your flash exposure and your depth of field.

Sunday, December 7, 2014

Setting Up the Shot - Wild Sierra

wild sierra

Camera - Nikon D2X
Lens - Nikon 50mm f/1.8G AF-S
Exposure - 1/250 @ f/6.3
Focal Length - 50mm

Lighting - LP180
Light Modifier(s) - 28" Octobox
Trigger - Pixel Opas

Single light set up with a LumoPro LPXXX inside a 28" Octobox. The main light is set so that it is able to be feathered in for the background light as well. The amount of light that hits the back wall is controlled by the distance between the subject and the wall.

Saturday, December 6, 2014

Setting up the shot - High Key Ash


Camera - Konica Minolta 7D
Lens - Tamron 90mm f/2.8
Exposure - 1/45 @ f/2.8
Focal Length - 90mm

Lighting - Brand X strobe
Light Modifier(s) - 60" Westcott shoot through umbrella, and large diffusion panel.
Trigger - Pocketwizard


For this shot I set up a large diffuser for the background and placed a strobe behind it to blow out the background and also to give some back light through her hair.

For the key light I used another strobe shooting through a Westcott 60" shoot through umbrella.
With her looking down her hair fell forward a bit and i increased the power from the light behind her to let the back light eat up some of her hair.

I wanted to capture a high key image of Ashlee and the honesty in her expression.

Thursday, December 4, 2014

Mixing it up with Manual focus.


Every now and again I love to bust out my old M42 lenses and throw them on my Nikon. These old lenses have great image quality, are sharp as hell, and are loaded with personality. Beyond their attributes they tend to be very inexpensive as well

To get these lenses to work with any DSLR camera all you need is an adapter ring. I got mine for about twenty dollars on eBay. There are a few different versions of the M42 lens adapters. The one that I picked up is the most simple version. It is one machined piece of metal with a Nikon F mount on one side and then a threaded 42mm female thread in the front center of the adapter ring.


There is only one issue with this set up and that is some of the lenses cannot focus as close as they were designed to on film camera. To overcome this I bought a set of three macro ring adapters. They work by putting the lens farther away from the sensor and increase the minimum focus distance. This works brilliantly and as they are only machined aluminum they too cost next to nothing on eBay.


Most newer higher end cameras will allow you to place manual focus lenses onto their bodies with an appropriate adapter. You will control the aperture manually but most camera functions will work without a problem. On my Nikon cameras TTL will also function with out any problems.


The focus lock light will also work with this set up on most higher end Nikon camera. It is incredibly helpful to make sure that you have your focus correct and as sharp as possible. Just make sure that you check your camera's manual to make sure that it is a supported function with manual focus lenses mounted.


Using macro extension rings with your M42 lenses will allow you to get into macro photography with out the cost of buying a macro lens. Just make sure that you have a good sturdy tripod to keep everything steady. This situation would also benefit by using your camera timer to trip the shutter or any other method of remote triggering your shutter.


By using some old M42 screw mount manual focus lenses on your DSLR you will have a very inexpensive way to freshen up the way that you shoot and have more lens options in your bag.

Sunday, November 30, 2014

A note to manufacturers about batteries.


IMG_20141128_195324

Just about every photographer on the planet that uses small flash units carries one type of battery  with them at all times: AA’s. It can be frustrating to keep on hand a stock of several different size batteries let alone having your kit fully stocked with different sizes. Call me lazy but I want to keep things as simple as possible and use one style of power cell.

I think that there are many photography product companies out there today that are just missing the mark with their products by just one point, and that is the type of batteries their devices are powered by.

I understand the need and desire to produce products that are as compact and portable as possible, but I do not think that any photographer on the planet would object to increasing the size of said product to accommodate AA batteries.

It drives me completely batty having to carry multiple types of batteries with me. So, manufacturing companies let’s just pretend that  AAA, CR123a, Coin, and any other size batteries that you can think of just do not exist. There are only AA batteries.

Friday, November 28, 2014

Flash Facts - 0


Hey there kids, I am going to be starting a new ongoing series here on the Vanished Twin Blog. Can you guess what it is going to be called?

That's right Flash Facts is going to be all about your flash. Both on camera and off.

So, stay tuned for some fun and exciting tips and tricks and good old fashioned learning.

Wednesday, November 26, 2014

RadioPopper Photogenic Receiver


The Photogenic Receiver allows remote triggering and remote power control of most Photogenic brand lights. Simply attach the RP Photogenic Receiver to the port on the bottom of your Photogenic light and you're all set. The Photogenic Receiver is powered directly from the light and requires no batteries. The Photogenic Receiver is configured using a digital display on the front of the receiver.


-No batteries required

-Stop accurate power control

-Assigned to one of 4 groups/zones

-Supports all 16 RadioPopper channels

The Photogenic Receiver works with all PowerLight and Solair series Photogenic lights except those lights with manual sliders at the rear.

A Jr2 Transmitter is required to control power levels of the attached Photogenic light, though it may be triggered by any RadioPopper transmitter (Jr2, PX, JrX, Nano).

Thursday, August 1, 2013

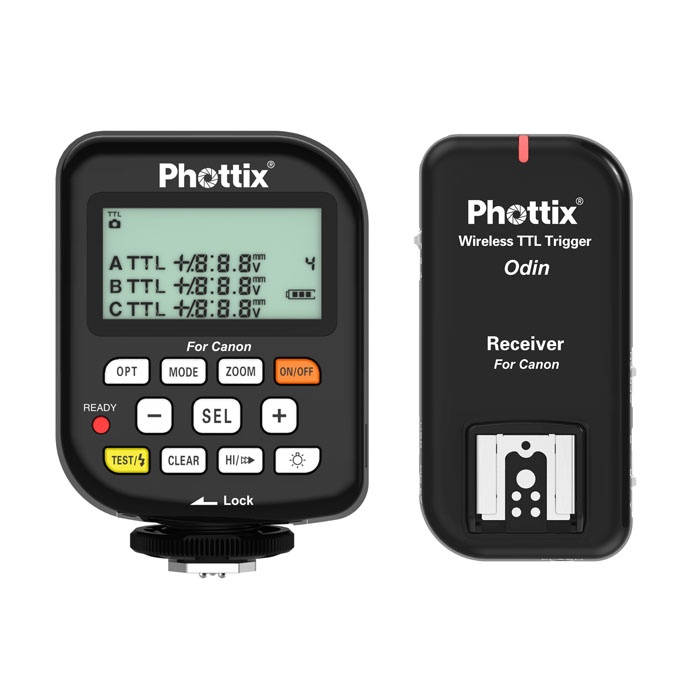
Phottix Odin for Canon firmware update plus ods update.

Phottix_Odin_TTL_

New firmware for the Phottix Odin TTL Trigger for Canon is available. v1.24 for the original Odin and v2.03 for the Odin 1.5 can be downloaded at the links below. That does this firmware offer:

Friday, March 8, 2013

WESTCOTT LAUNCHES LIGHTAPALOOZA 2013


Westcott, one of the world’s largest lighting and light modifier companies, today announced a lighting celebration like none other. Westcott’s team is proud to announce the launch of Lightapalooza, an exciting year-long promotion for all lighting fanatics, creatives and photo enthusiasts. There’ll be giveaways galore featuring weekly contests, hundreds of prizes and one jaw-dropping Grand Prize valued over $15,000!

Wednesday, February 20, 2013

New from LumoPro - LP605s and LP735


BATOKA CRATER, MARS., February 19th, 2013 — LumoPro®, a leading developer and manufacturer of off-camera flash equipment, announces two new products - the LP605S Compact 7.5ft Stand with Carrying Strap and the LP735 3-in-1 43” Compact Umbrella. Both products bring new updates to the LumoPro® lineup and further assists photographers in achieving portable off-camera lighting.

Wednesday, February 6, 2013

LumoPro Multi-Mount Beauty Dish!


February 5th, 2013 - LumoPro®, a leading developer and manufacturer of off-camera flash equipment, is happy to announce the new LumoPro® Multi-Mount Beauty Dish. Developed with the help of professional photographers around the world, the new Multi-Mount Beauty Dish is the most versatile product of its kind on the market.

Thursday, January 31, 2013

Coming Soon: LumoPro LP180!


LumoPro posted a teaser image of the LP160 replacement, the LP180 on their Facebook page. To say that I am excited about this flash is a massive understatement.

Monday, January 21, 2013

Trigmaster Plus II 2.4G


Aputure is pleased to announce our latest flagship trigger, the Trigmaster Plus II 2.4G, a great new tool for your flash triggering needs.